Printing the Pattern
In the folder there are PDFs for each pattern size small through xl. Choose your size and open the PDF to print. The PDFs marked by size are the front and back patterns. The second PDF file that needs to be printed, regardless of size, is the Details PDF. This file contains the patterns for the pocket bags, flaps and zipper facings etc.
When printing choose borderless printing, set orientation to auto and choose print at actual size.
Keep the front/back and details pattern seperate from one another.
Assembling the Pattern
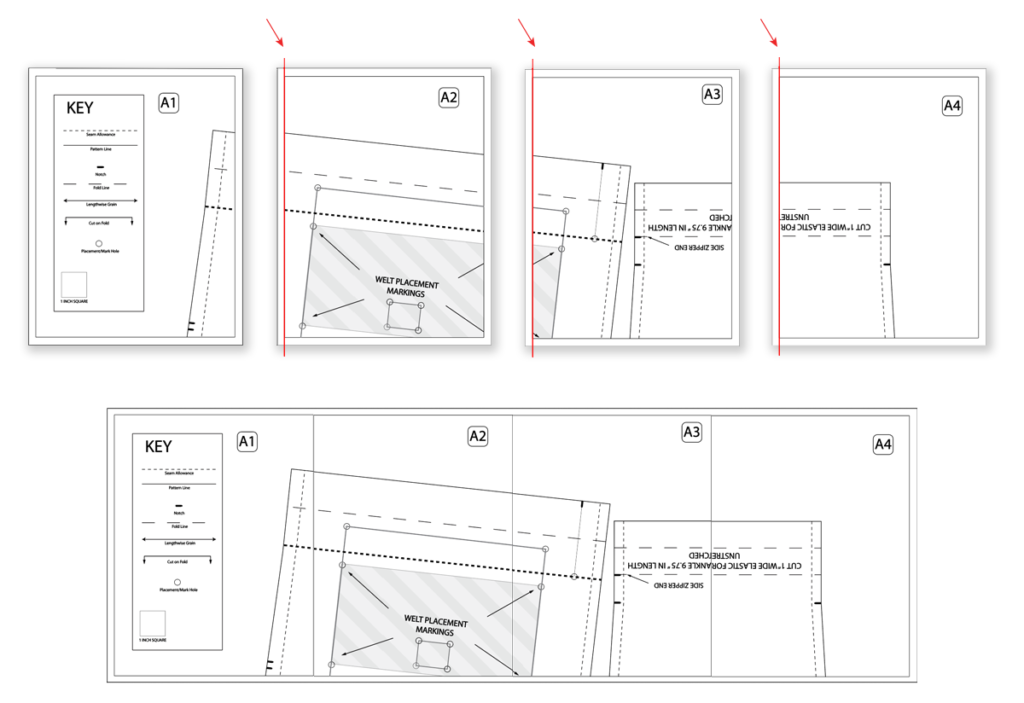
Sort the front/back pattern into rows: A,B,C,D and E. Starting with row A, lay A1 down. Cut the left margin off of A2 and place on top of A1’s right margin, line it up and tape it down. Repeat this until you have the row completed.
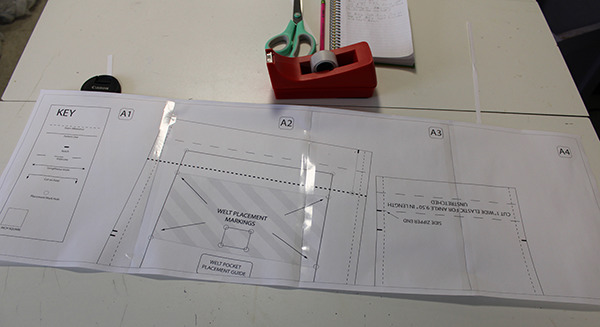
Picture of how it should look with the first row taped together.
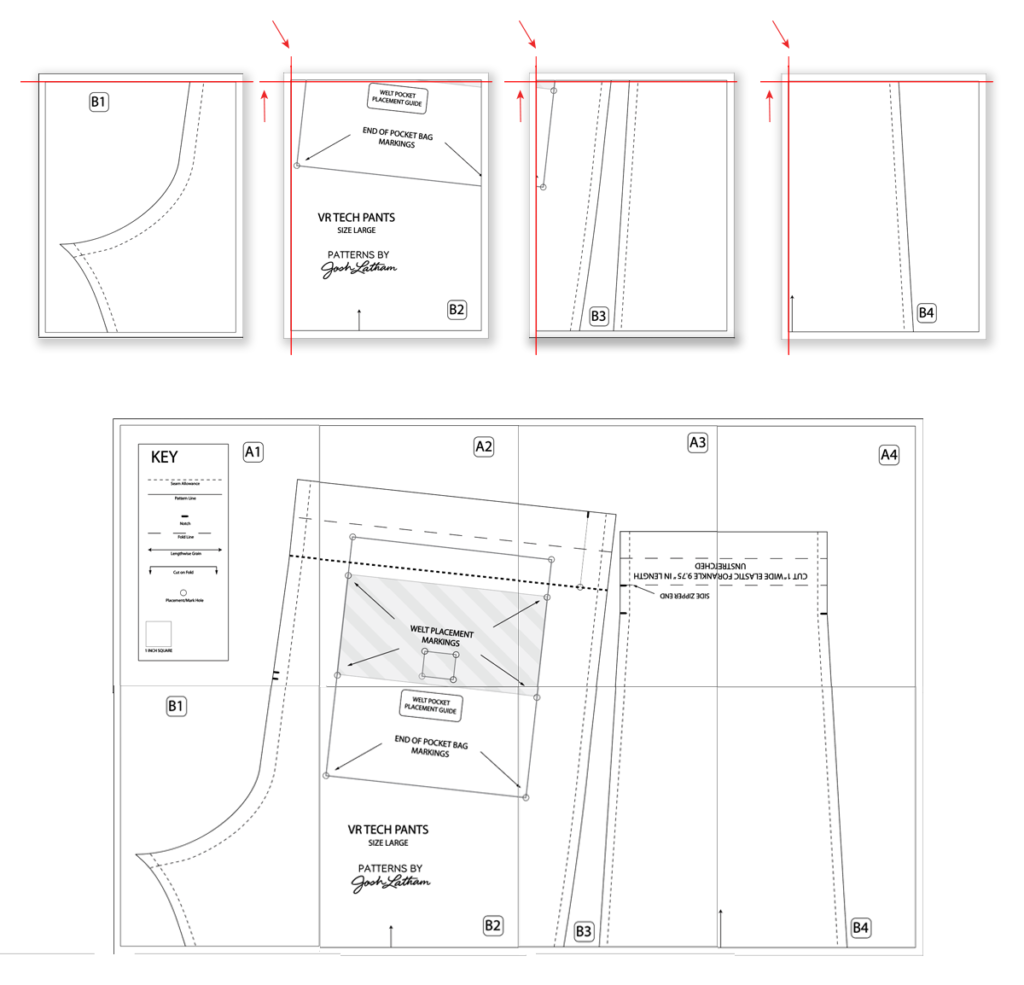
Next cut the top margin of B1 and place on top of A1’s bottom margin and line up. Then cut B2’s top and left margin and place on top of A2’s bottom margin and B1’s right margin. Repeat this for rows B,C,D and E until you have the pattern completed.
The Details pattern has 2 rows of 4 pages. And also individual pages that do not have row and number tags and do not need to be taped together. Tape together as you did with the front and back pattern.
Cutting Out

Slit that marks seam allowance of the inserted zipper at the knee to ankle.
Cut out front and back patterns. Cut slit at the top of where the zipper is inserted at the knee. See picture above.
When marking and cutting the front out of fabric, remember to lift and mark this slit and cut the slit when cutting out.
Notching & Placement Holes
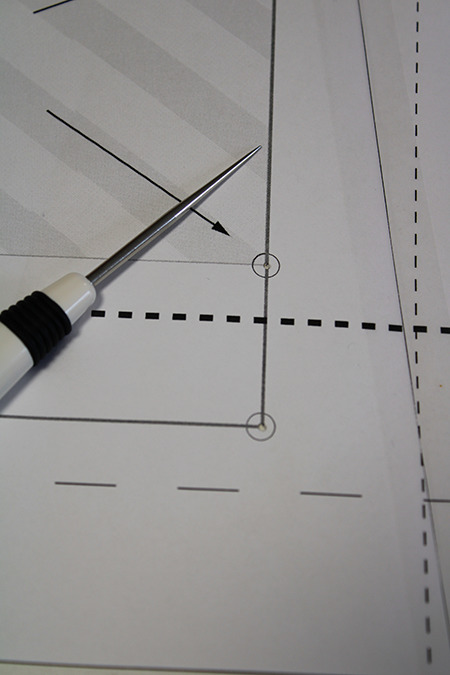
Awl creates the hole for tailor’s pencil to go through.
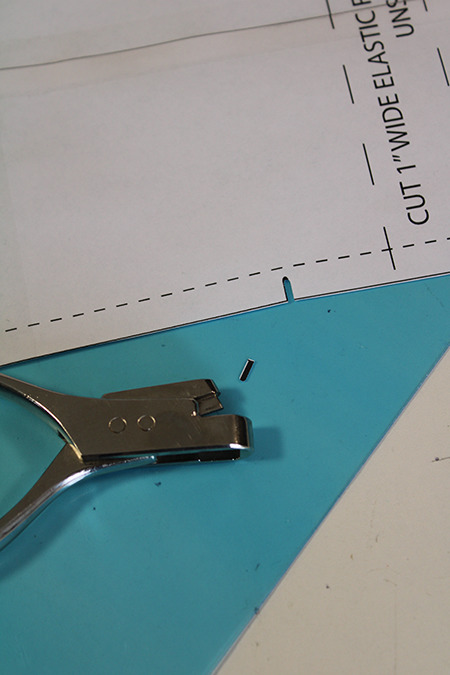
Notch marks are standard size and can be notched with a pattern notcher.
Trim or punch out all notches with a pattern notcher.
With an awl create holes big enough for a tailor’s pencil to go in the center of the circles to mark placement holes in any pattern pieces that have them.