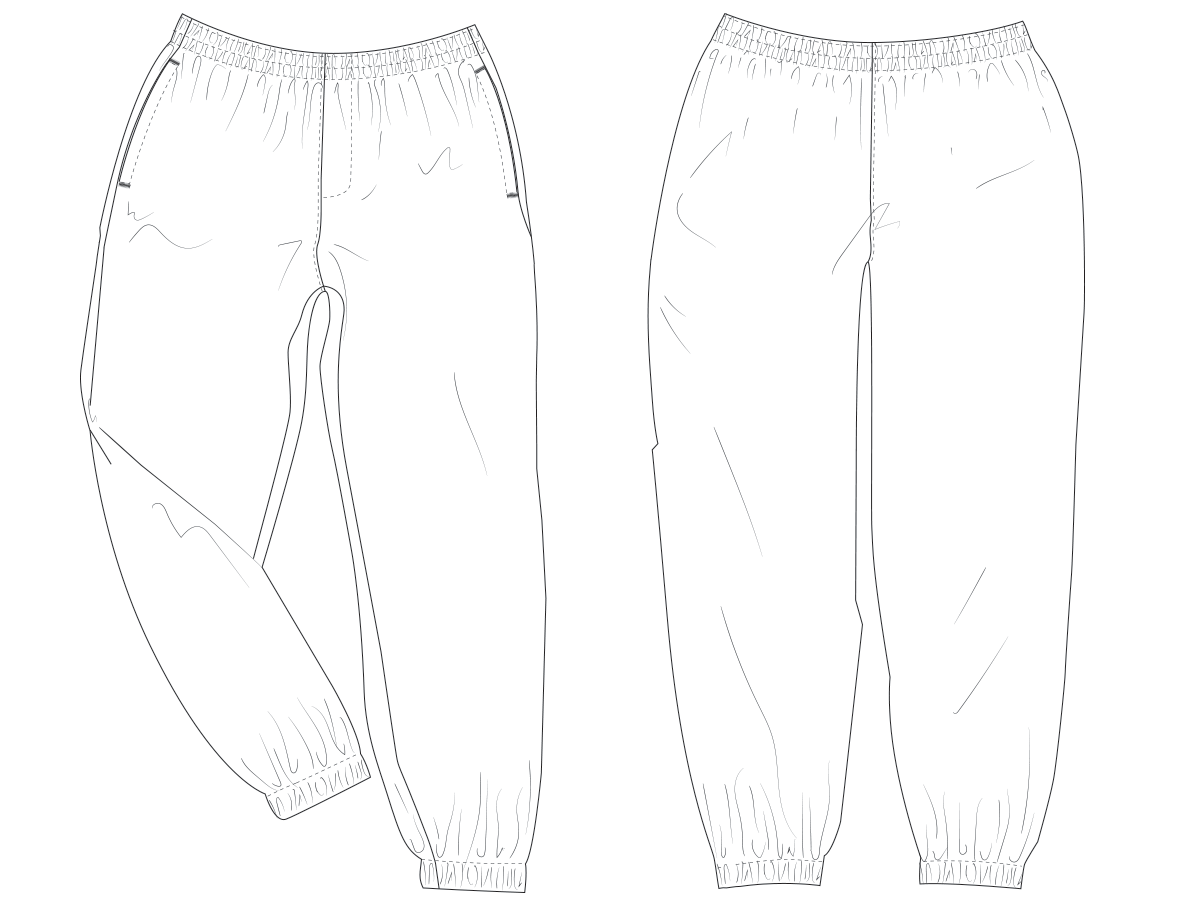
Before You Begin
You can break out of this blog entry and print these instructions by clicking here.
I don’t always tell you to backtack when beginning and ending sewing in these instructions. I didn’t feel it neccessary, it’s a given. Sometimes stitching will be marked in red, this is so you can see it better, doesn’t mean to use red thread. 😀 Red lines are tailor chalk lines.
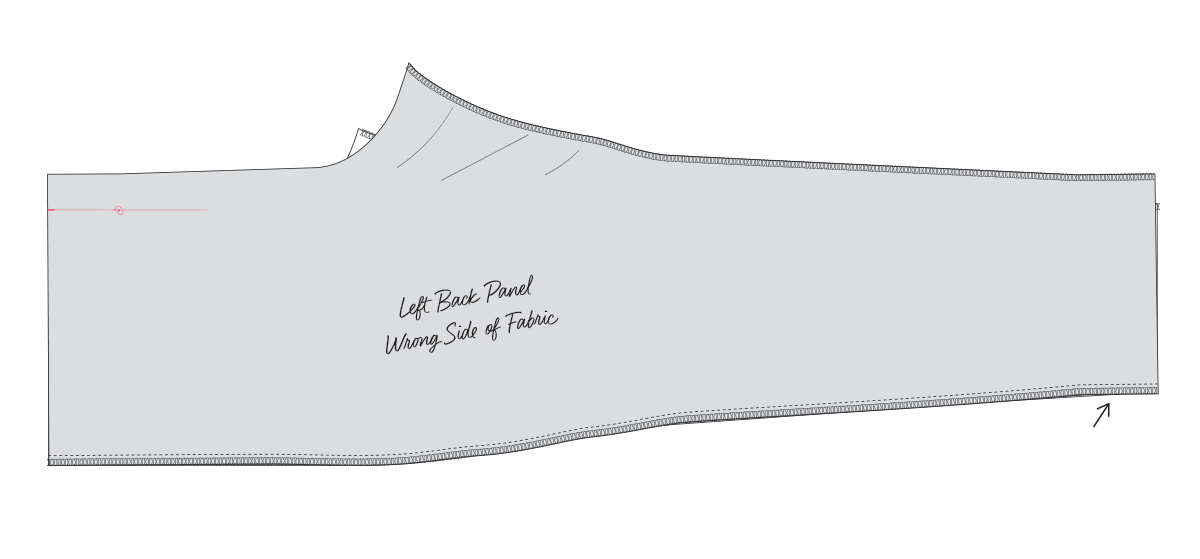
Finishing Back Panels
Overlock or zigzag edge of inseam and side seam of the back panels.
Constructing the Front Panels
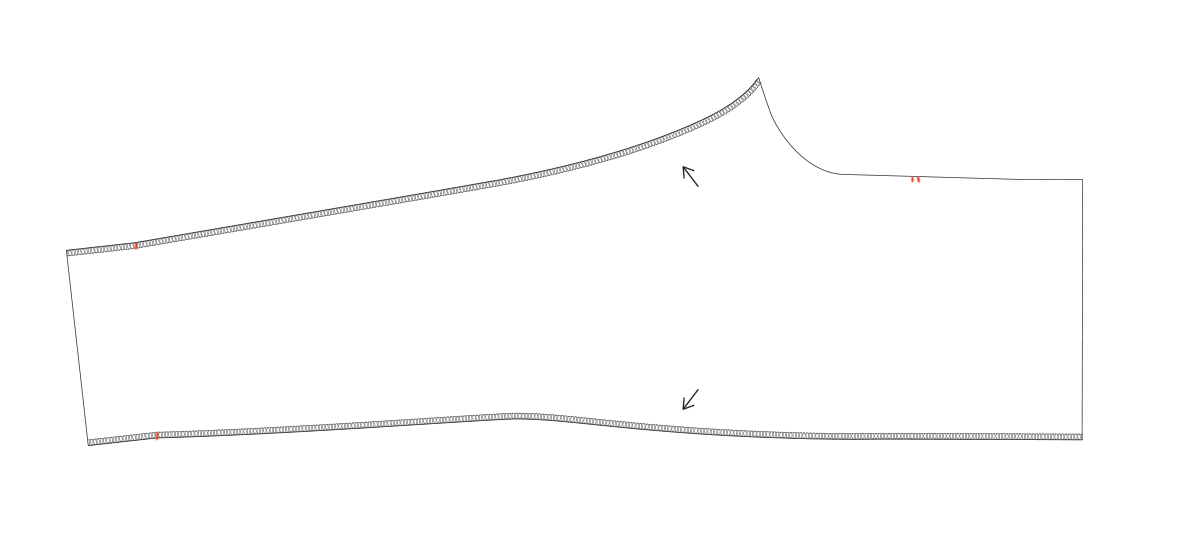
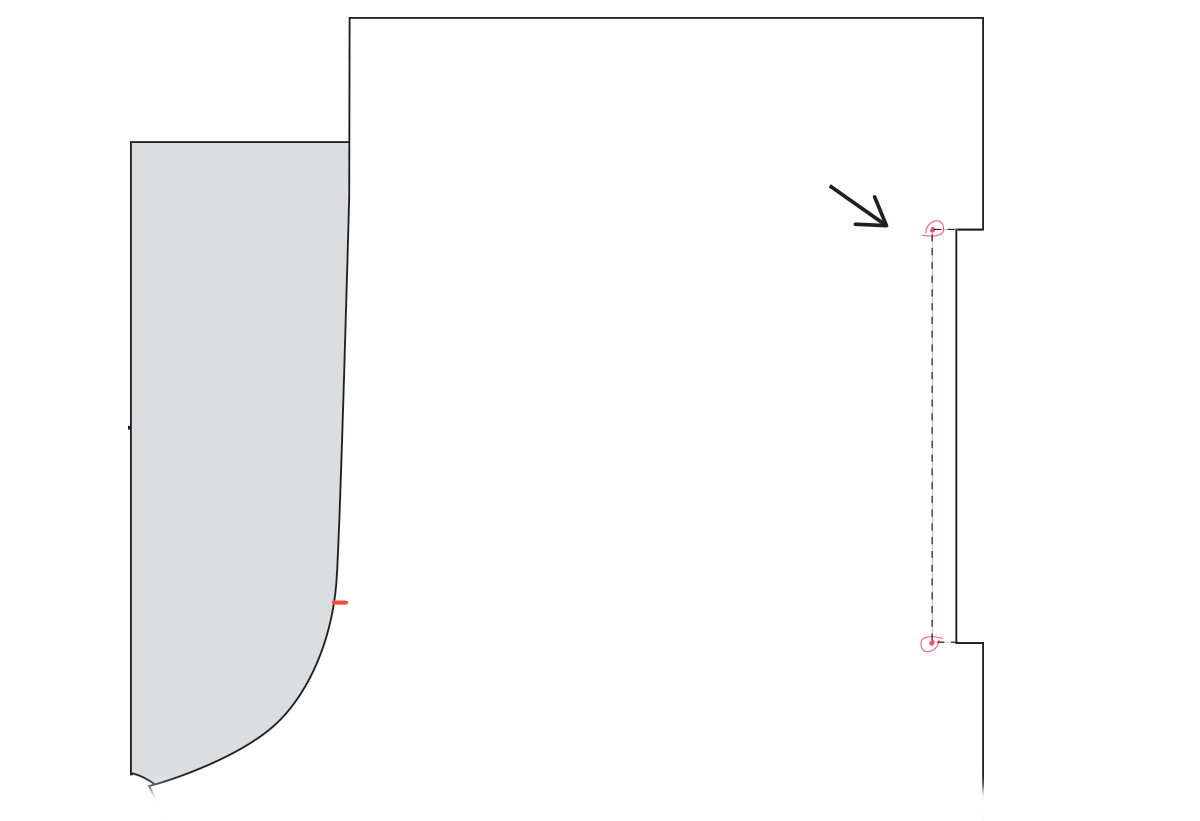
Mark pocket bag 3/8 + 1/16 inches (1.11125 cm)from edge where marked.
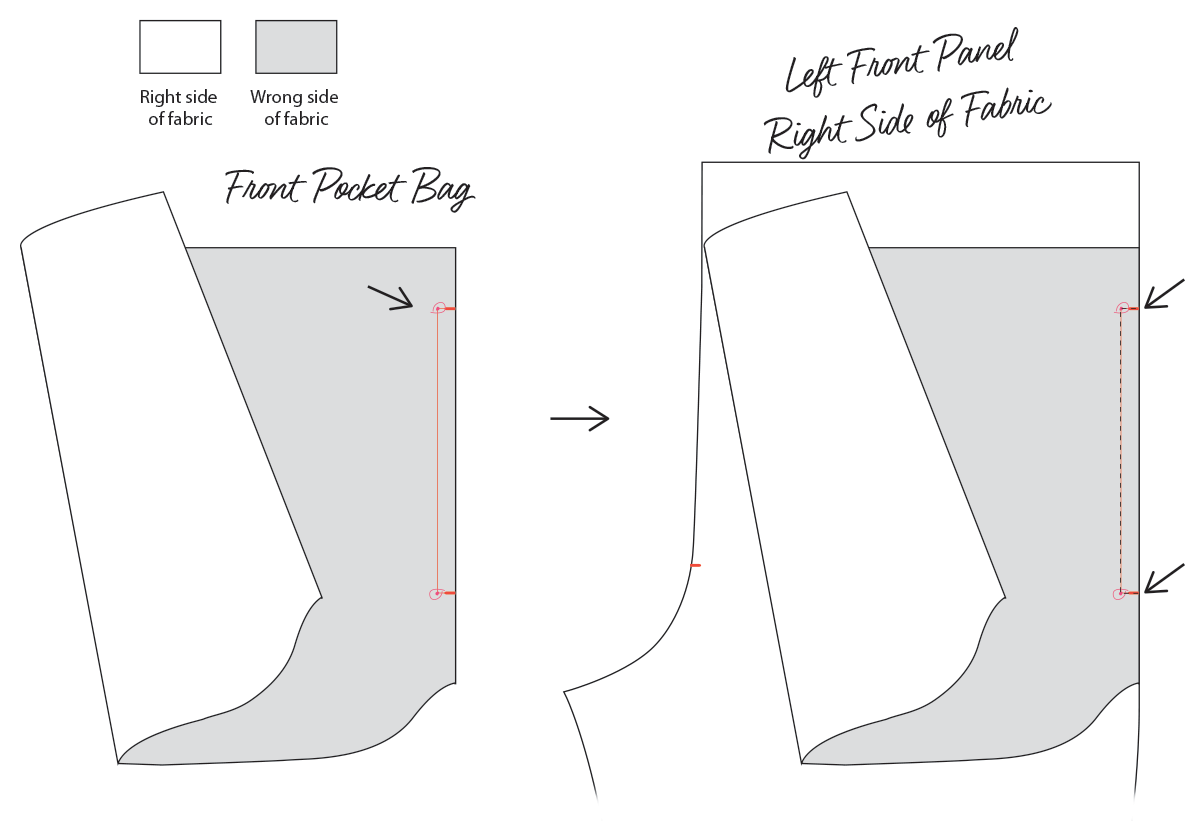
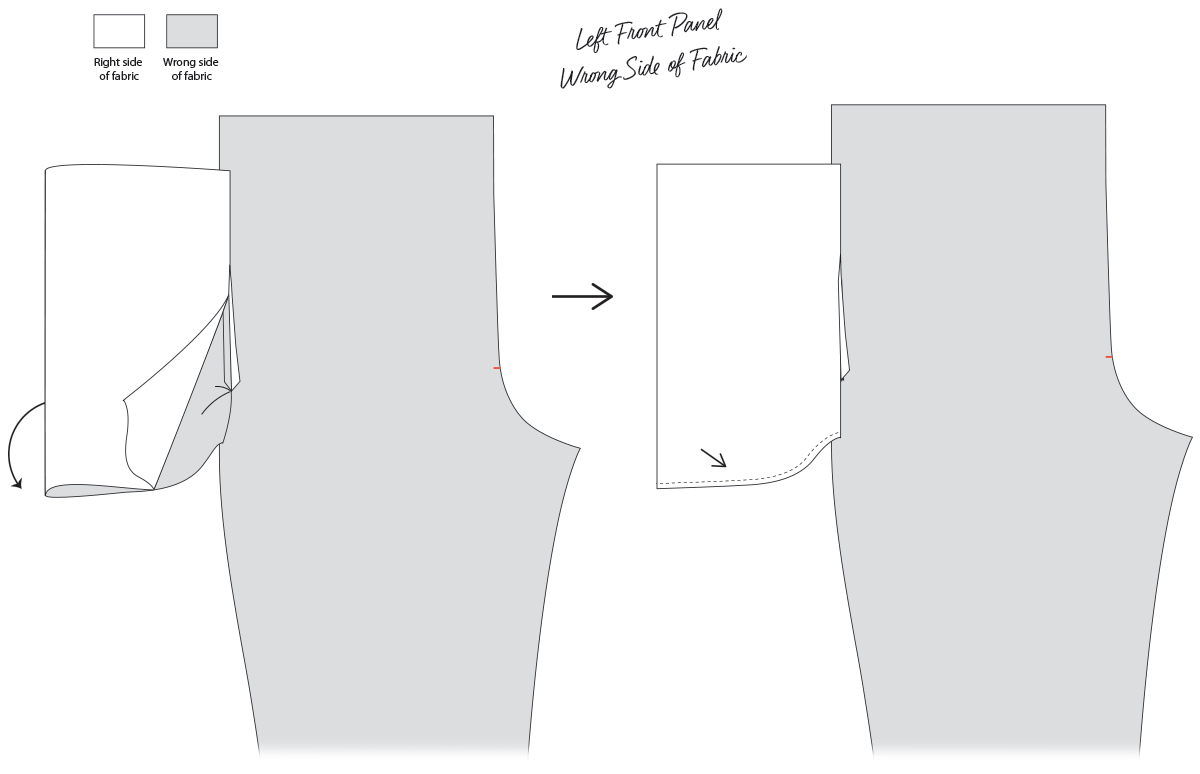
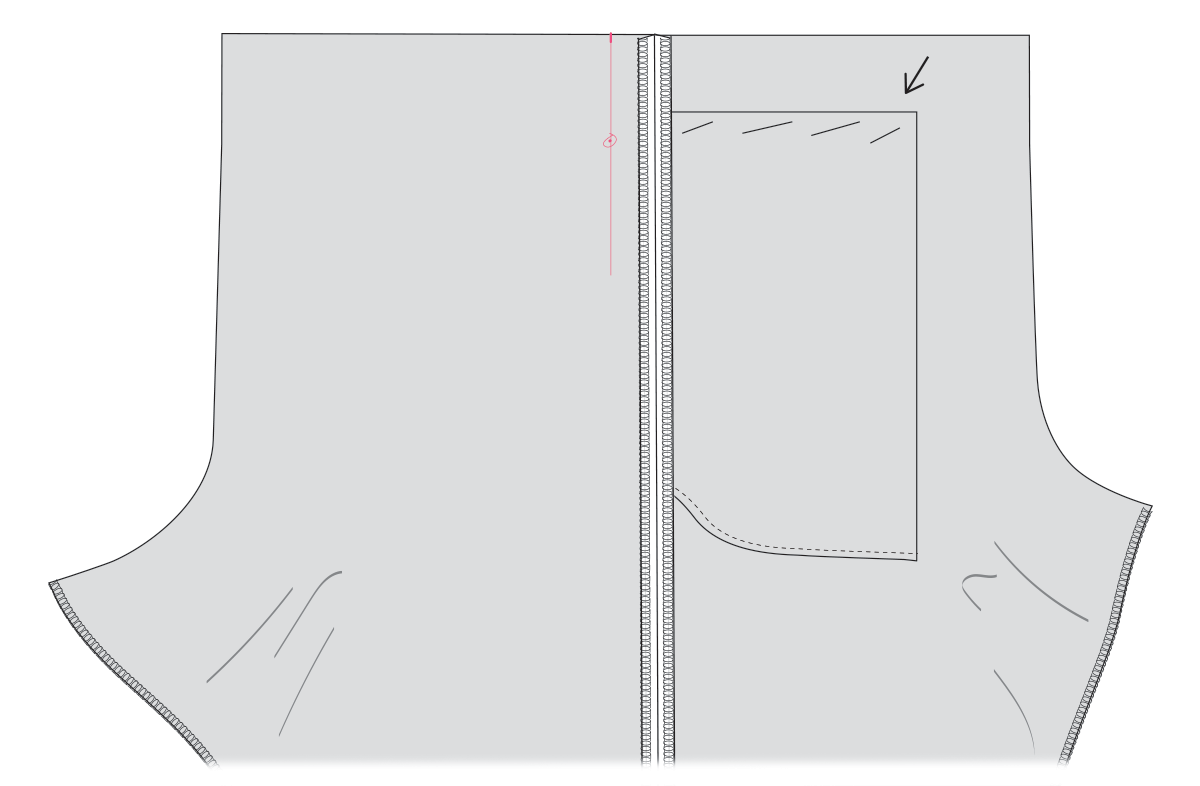
With pocket bag facing wrong side up and left front panel facing right side up, place pocket bag on top of front left panel and line notches up. Sew around markings like the illustration above.
Cut corners and press open the seams.
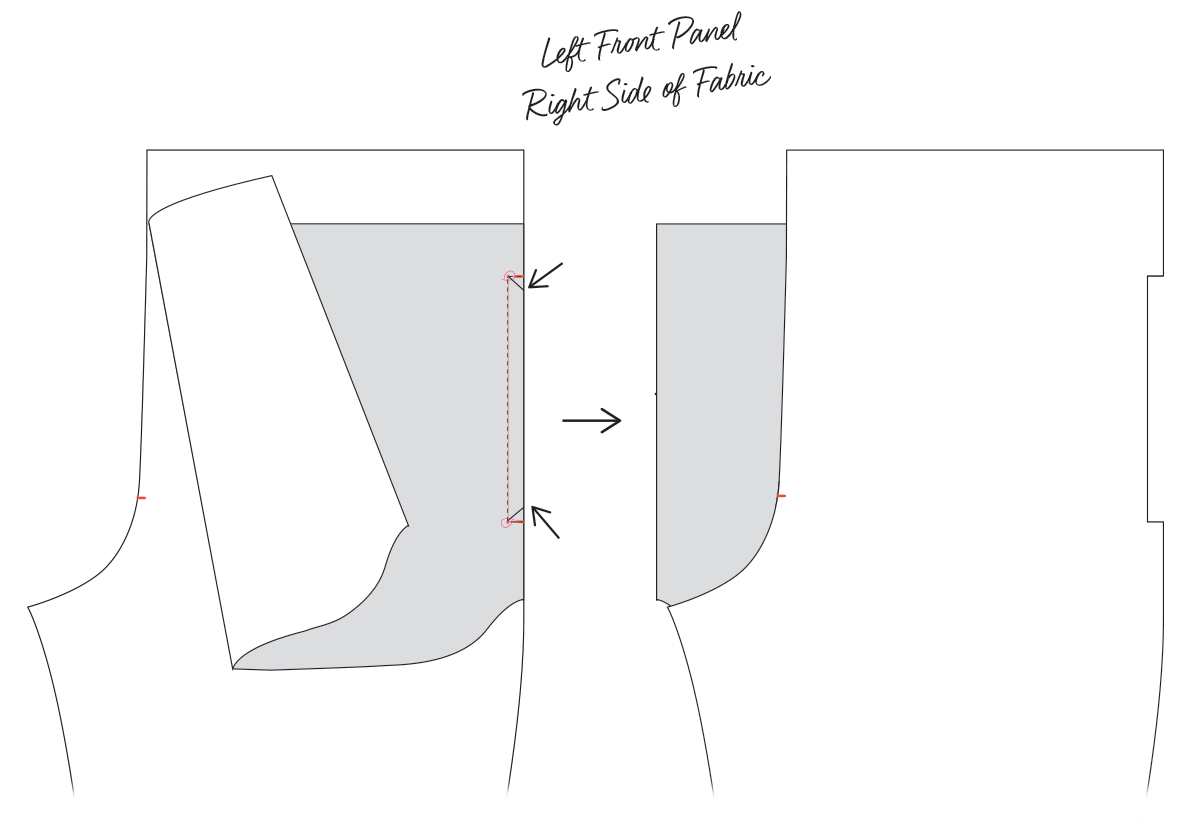
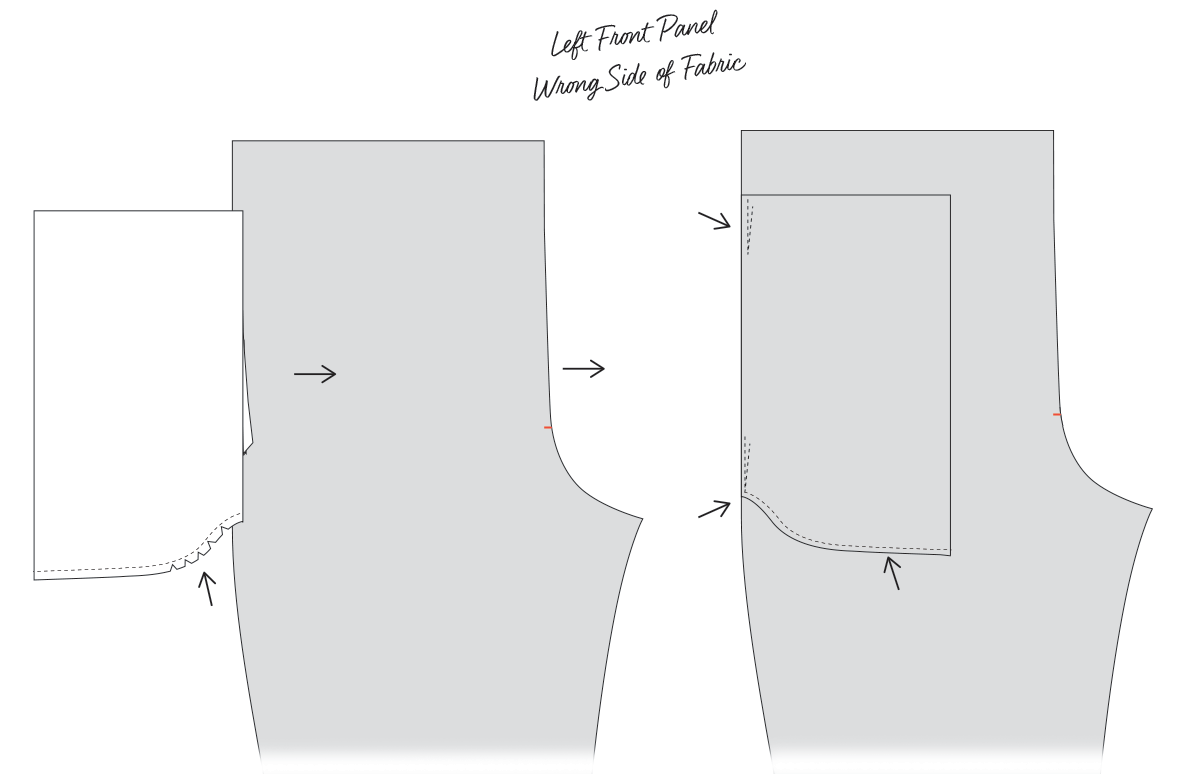
Turn back front pocket bag towards wrong side of left panel and press front pocket opening flat.
Mark 3/8 inches (1 cm)from edge of front pocket opening and sew around the marking.
Turn front panel around to the wrong side, flip pocket bag around and place bottom ends together exactly, sew.25 inch (6 mm) from edge.
Press open seam, snip curved part of pocket, turn in and press with iron again. Sew bottom of pocket bag edge 1/4 inch (6 mm) from bottom.
Evenly align the pocket bag with the side seam and tack down the pocket to the front panel about 1/8 inch(3.175 mm)from the edge so it doesn’t move around.
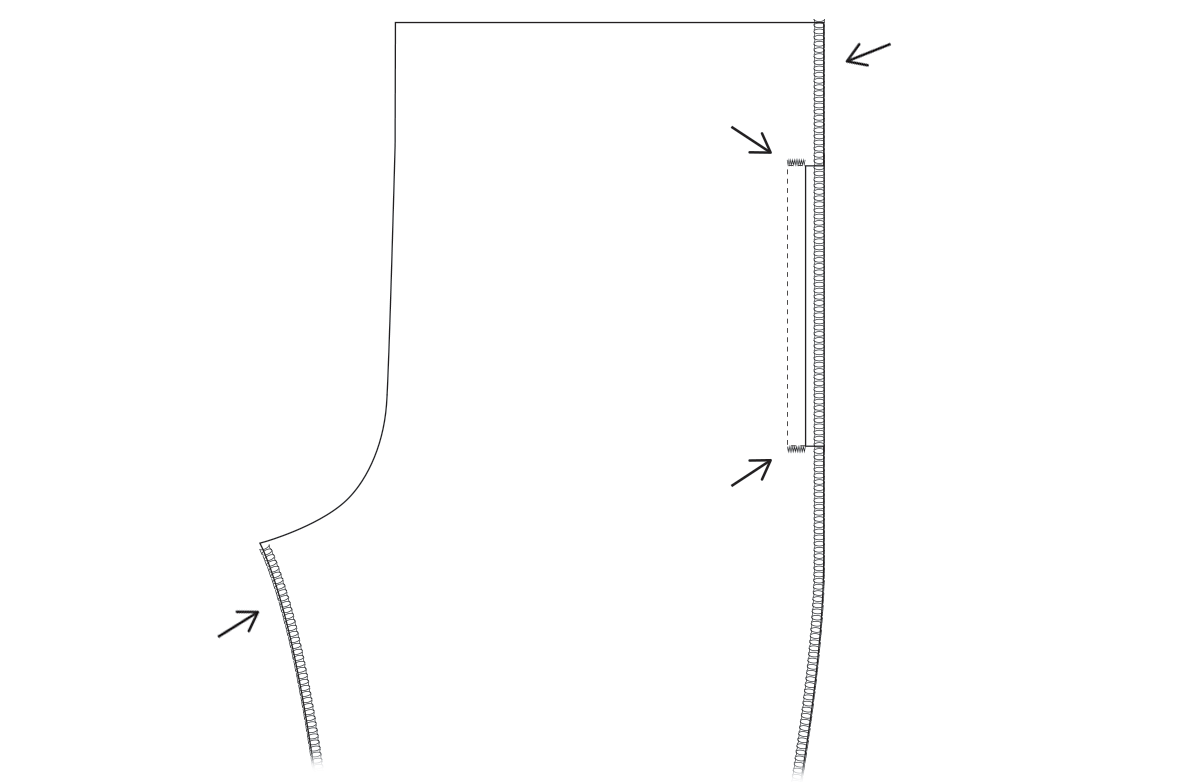
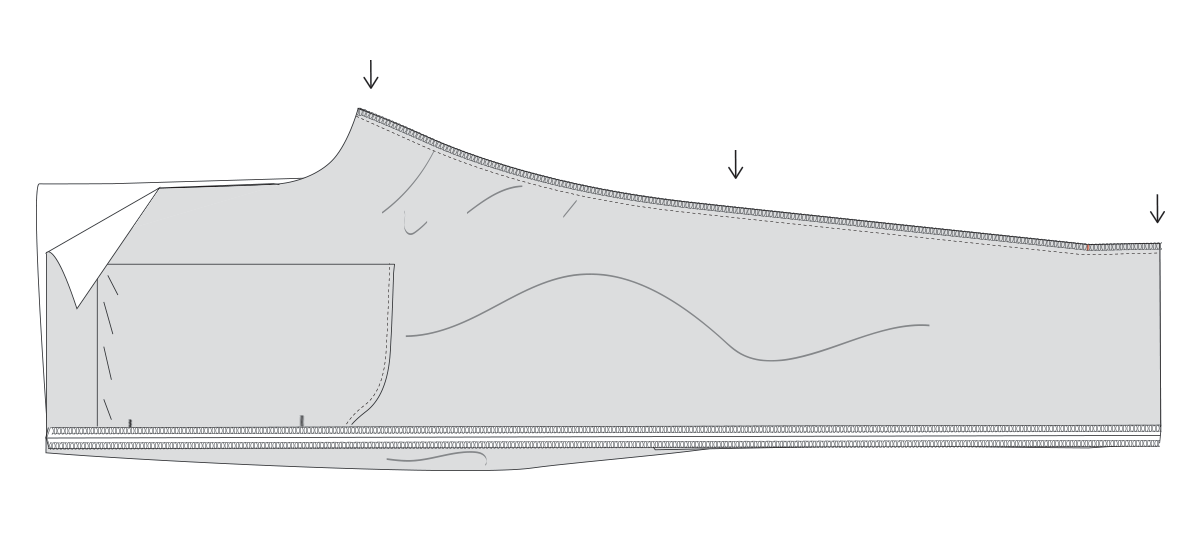
Overlock or zigzag side seams and inseams of both front panels.
Bartack the front pocket with a zigzag stitch. Set zigzag width to 2mm and length close to zero. Zigzag above and below the stitching like in the illustration above. It makes it easier to mark where the stitch will end and begin with a tailor’s pencil.
Finishing the pants
Join side seams to fronts and backs, lining up side seams. Pin or clip together and sew with 3/8 inch (1 cm) seam allowance. Press side seams open.
With thread and needle baste front pocket bags raw open tops down so they don’t shift around when sewing the waist elastic in.
Pin or clip together inseams on each side. Sew together with 3/8 inch (1 cm) seam allowance. Press open the inseams with an iron. Turn so they are right side out.
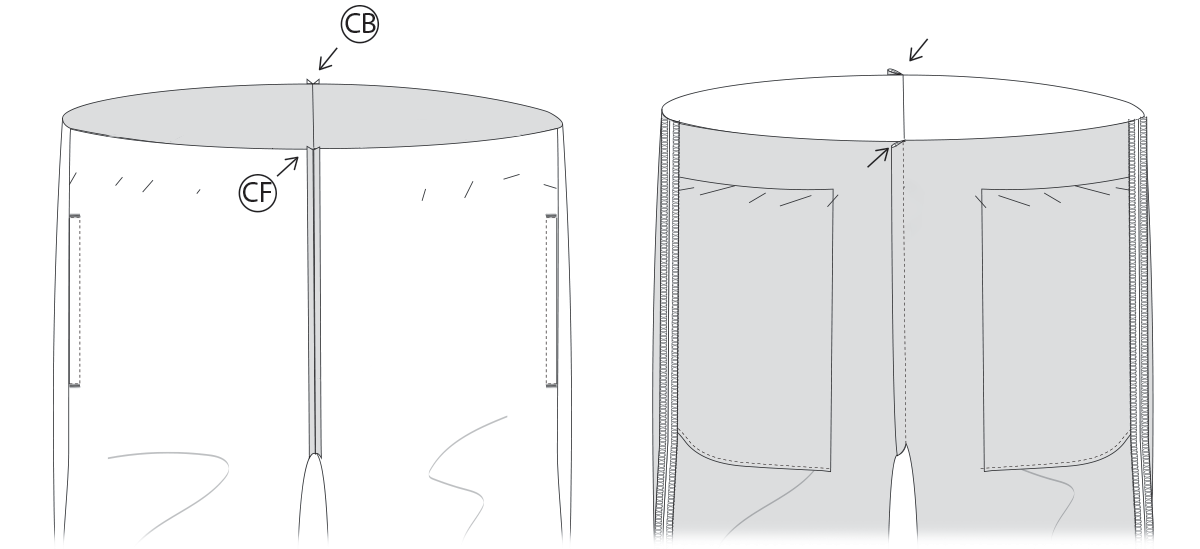
Clip or pin together at the center front and back, lining up back and front notches and the inseams. We are going to join the legs with a french seam. This will keep the most intimate area of the pants free of any rough serged seams. First sew .25 inch (6 mm) seam. Trim away any bulk where the inseams meet. Press open seam.
Turn out to wrong side and close up that .25 inch (6 mm) seam allowance with 3/8 seam (1 cm), finishing the french seam. Press seam.
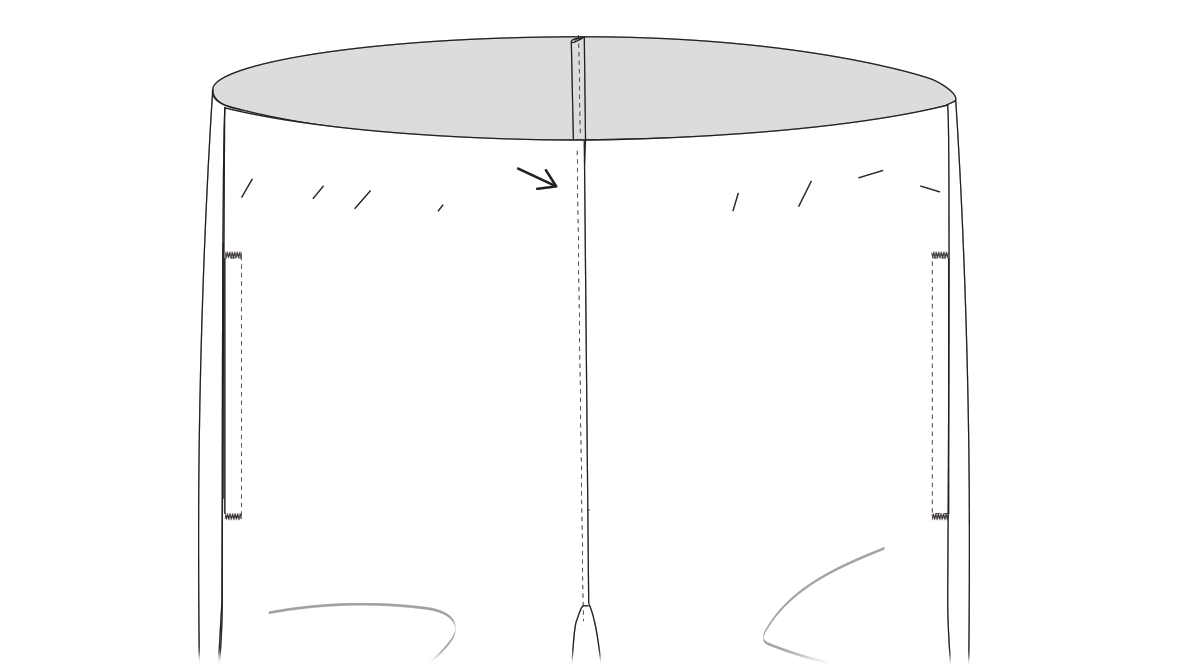
Turn right side out and press that seam flat on the outside, making sure the french seam is pointing away from the Left side. Top stitch the french seam down 1/16 inch (1.5875 mm)from edge. Compensating foot is great to have for this part.
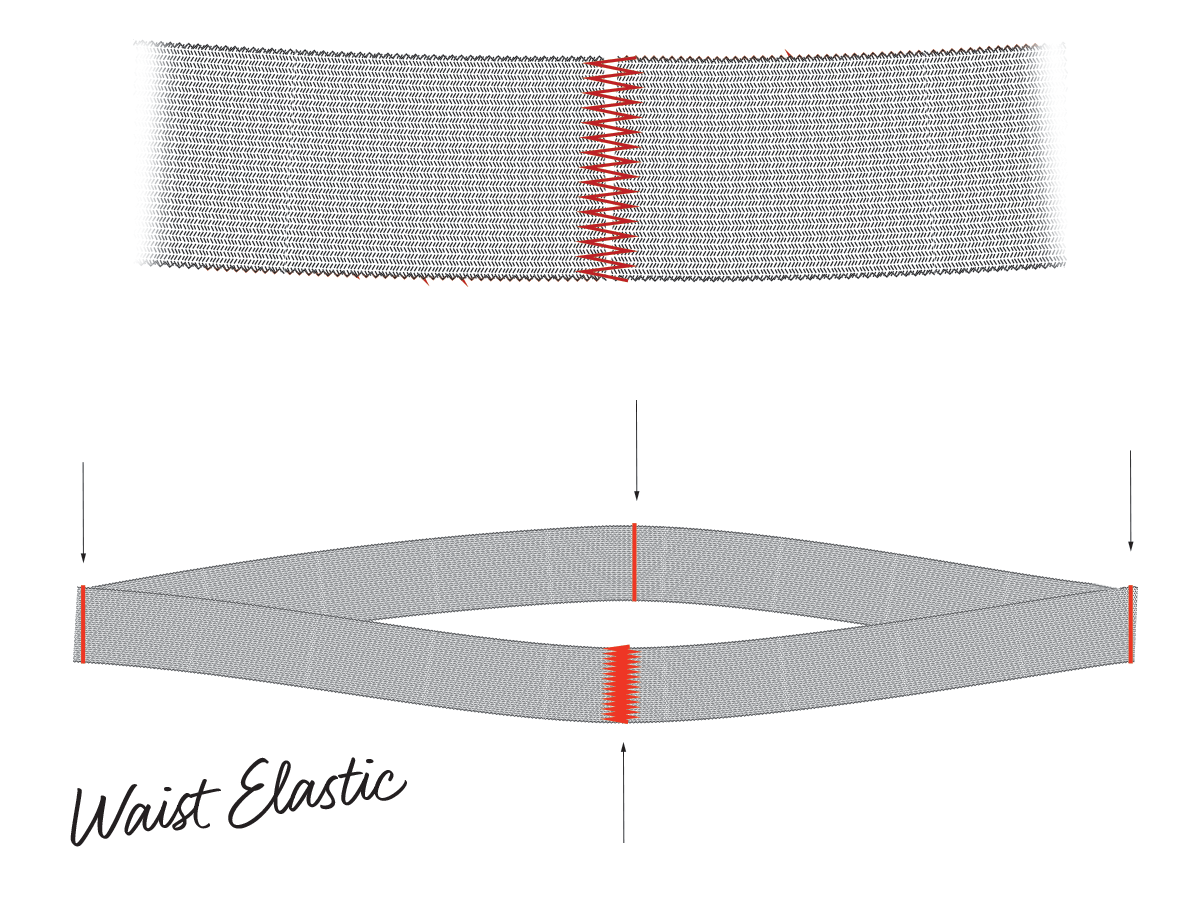
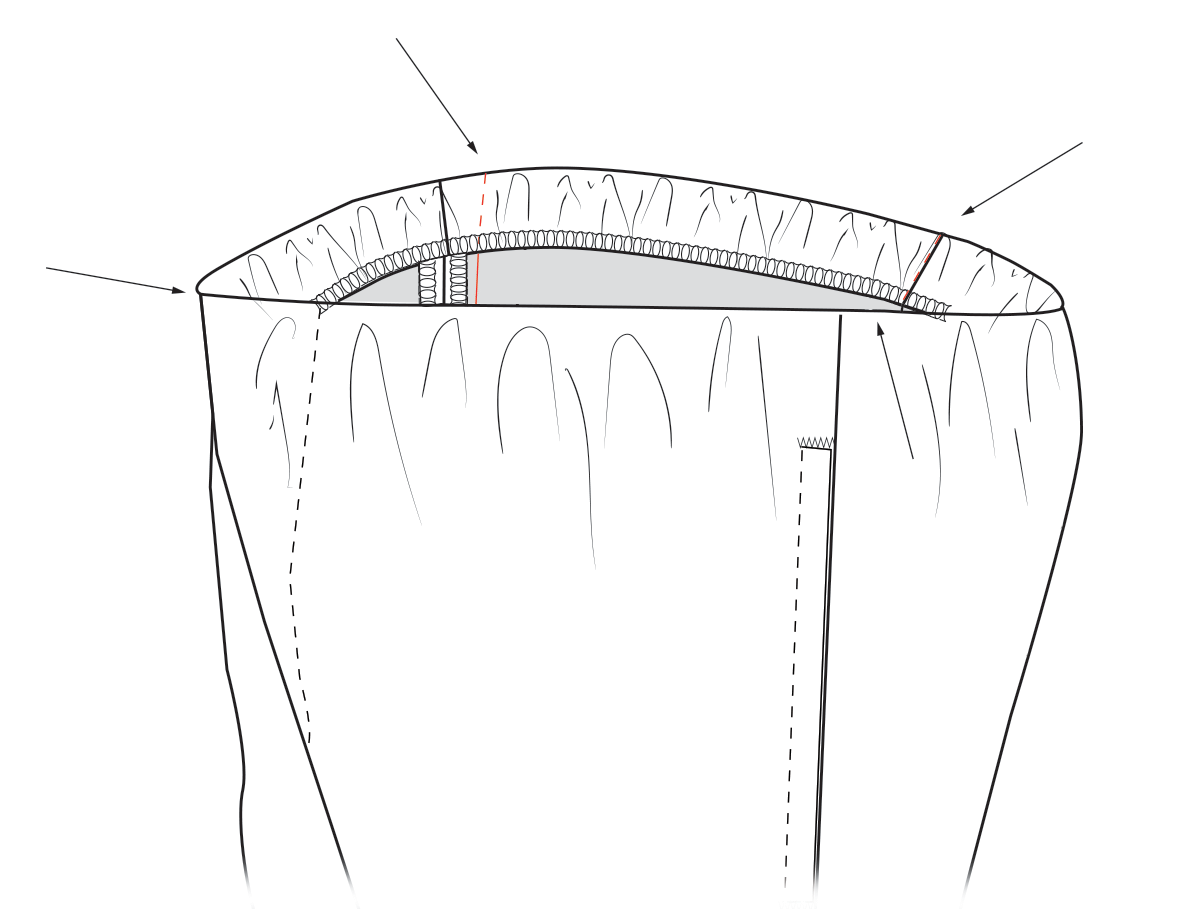
Sew a zig zag to connect the elastic ends together on the waist elastic forming a loop. Starting from the zig zagged end, fold in half and mark the opposite end with a tailor’s chalk. Square a line down. Now line up the zig zag end and the line you just made to determine the next 2 lines to mark and mark them. Square lines down. Now are elastic is sectioned into 4 equal sections.
We are going to join these 4 marks with the center front, center back and side marks and stitch them down in place. This will do two things, tac the elastic in place and keep the elastic evenly distributed around the waist as it’s sewn in.
Make sure marks are turned to the outside on the elastic so you can use them to line up the front/back center and side elastic lines. Start with the zig zag end, that lines up with the center back seam. Then sew the front the same way. Next the side lines. This stitching can be removed later, but I don’t bother, they are hidden within the ruffles of the elastic when it’s finished anyway.
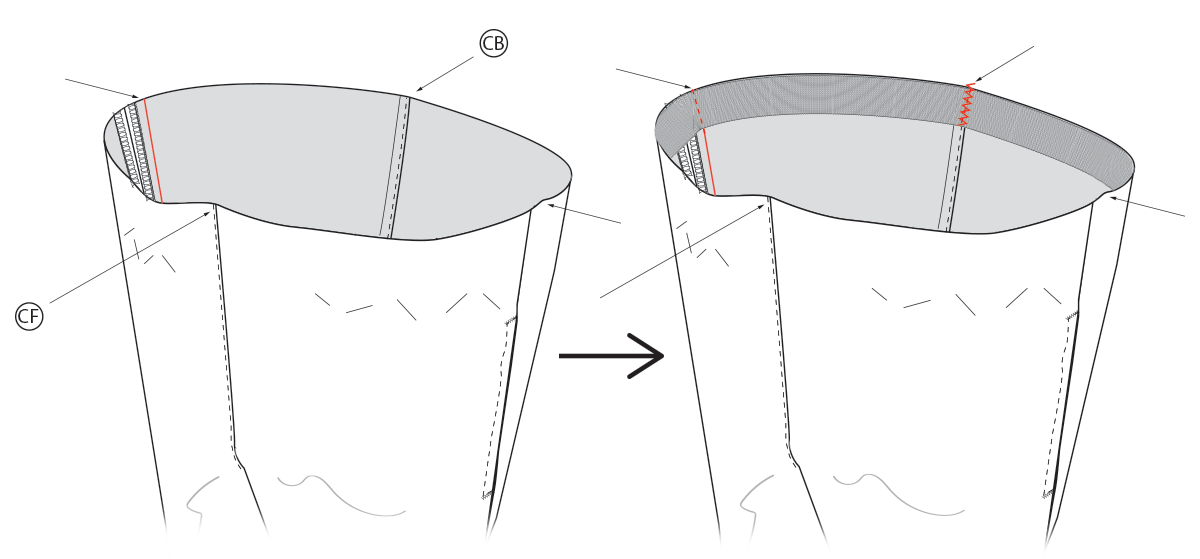
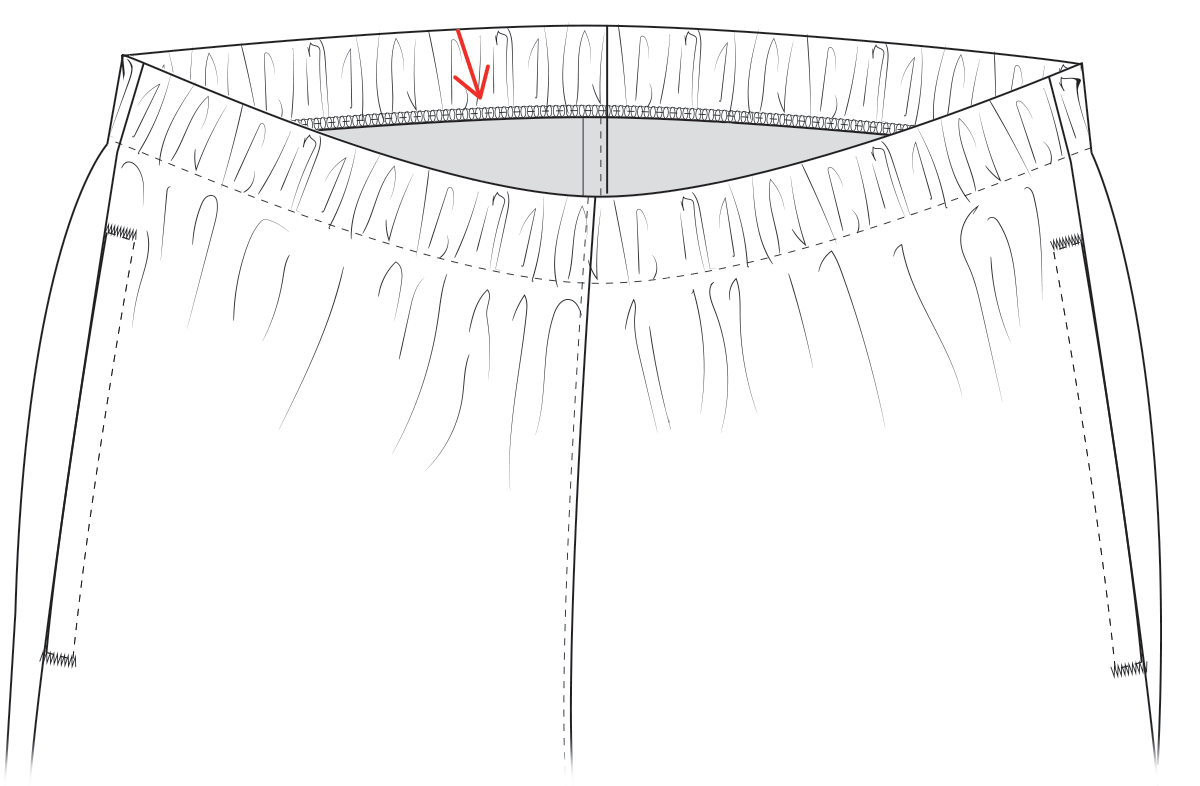
Line up raw edge on top of waist and elastic and serge or zig zag together at the top. This holds the elastic in place as well as gives that edge a nice clean finish. Do one of the 4 sections at a time, stretching the elastic out with the fabric each section.
Fold over waist and elastic, 1.50 inches (3.8 cm), width of elastic, and sew the 4 corners down again. Making sure you push the top of the elastic to the top of the fold and also making sure to line up the seams and markings as you did the first time.
NOTE: If you are putting labels in the waist, don’t forget them here.
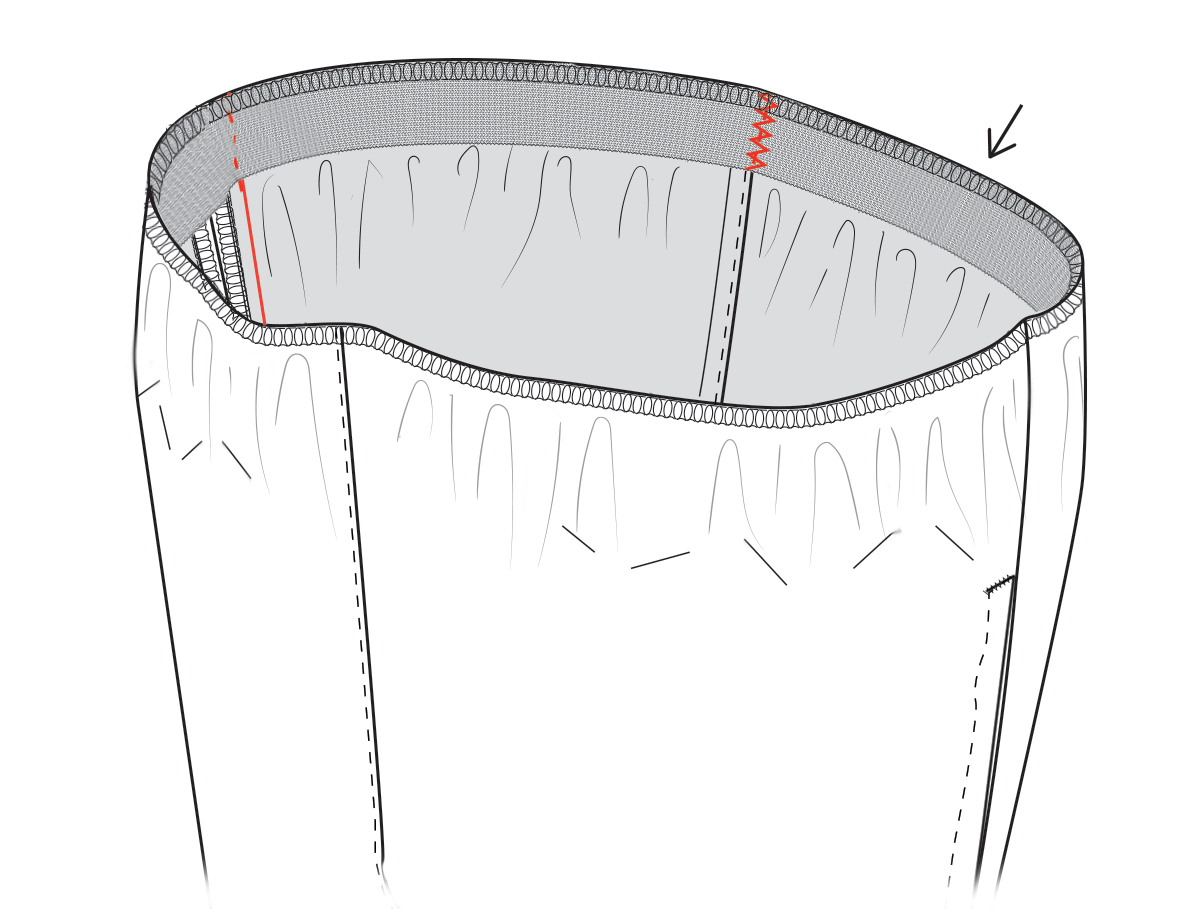
Set stitch length to 3 to 3.5. Sew elastic down , around the bottom, 1/16 inch (1.5875 mm) above the bottom edge. Stretching out 1 section at a time as you go. Stopping to rest at the end of each section with your needle down. A 1/16 inch (1.5875 mm) compensating foot is great to have on this part. Also, be careful that you sew the pocket bags flat. The edges of them can get caught on the presser foot and bunch up during this step. Now you can take out the basting around the waist that was holding the pocket bag edges in place.
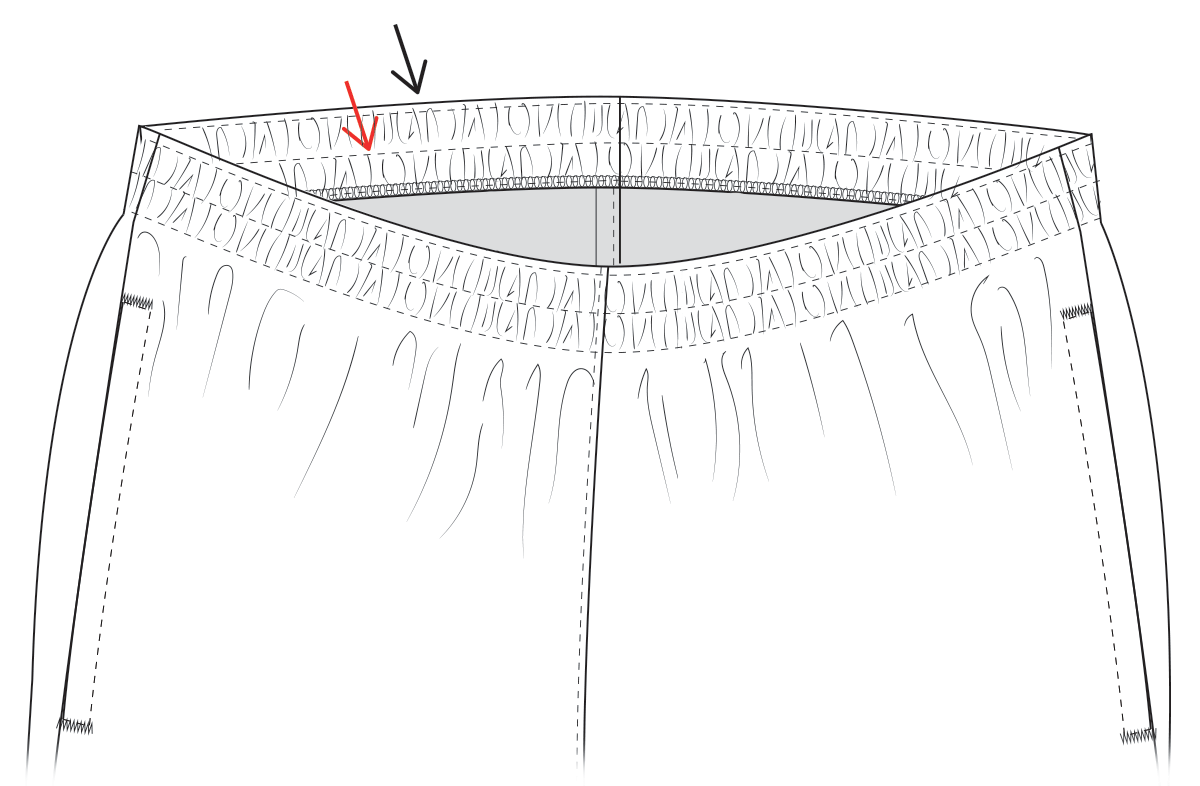
Sew 1/8 inch (3.175 mm) from the top edge all the way around, again a 1/8 inch (3.175 mm) compensating foot helps a lot on this part. The top may look a bit wavy, don’t worry we will fix that with the iron later. Last, sew the elastic down the middle, have right side turned up this time so you can see the last 2 stitch lines, to gauge the middle by eye.
Place the elastic waist around an ironing board and steam iron the elastic flat and steam out any waviness. The steam will help the elastic shrink and snap back. But BE CAREFUL, if you are using synthetic fabric, it can easily melt the fabric. Test your iron setting on a scrap piece of fabric first to make sure your iron isn’t too hot.
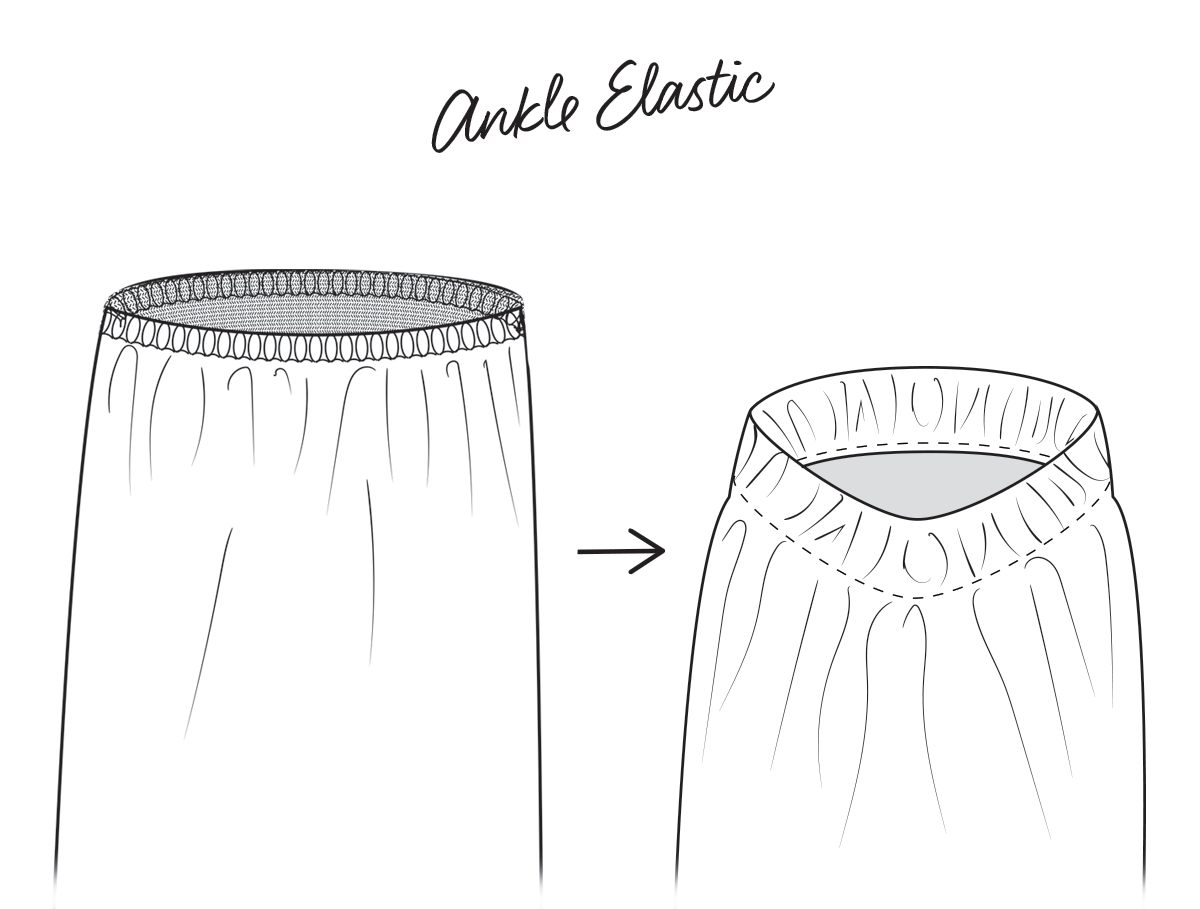
Loop ankle elastic by zizaging ends together, like you did with the waist. Place inside ankle, line up edge of elastic with bottom edge of pants, stretch out and overlock or zigzag around the edge.
Fold under elastic twice (1.50 inch (3.8 cm), the size of the elastic).Stretch out and sew down the elastic 1/8 inch (3.175 mm) from open edge.
Comments
2 responses to “VR Tech Pants Pattern – Simple Sew Instructions”
when i go to download the pattern it is just the zipper pocket
Sorry, I fixed the download link, try refreshing the page.